 LSS 4
LSS 4Create Digital Strip Animation
You can create your own strip animation in LSS4. There is a powerful yet easy-to-use animation creation system available. To start creating a new animation for a certain LED strip, you need to select a single strip first. The Add Animation function becomes available in the main menu or on the Settings pane.
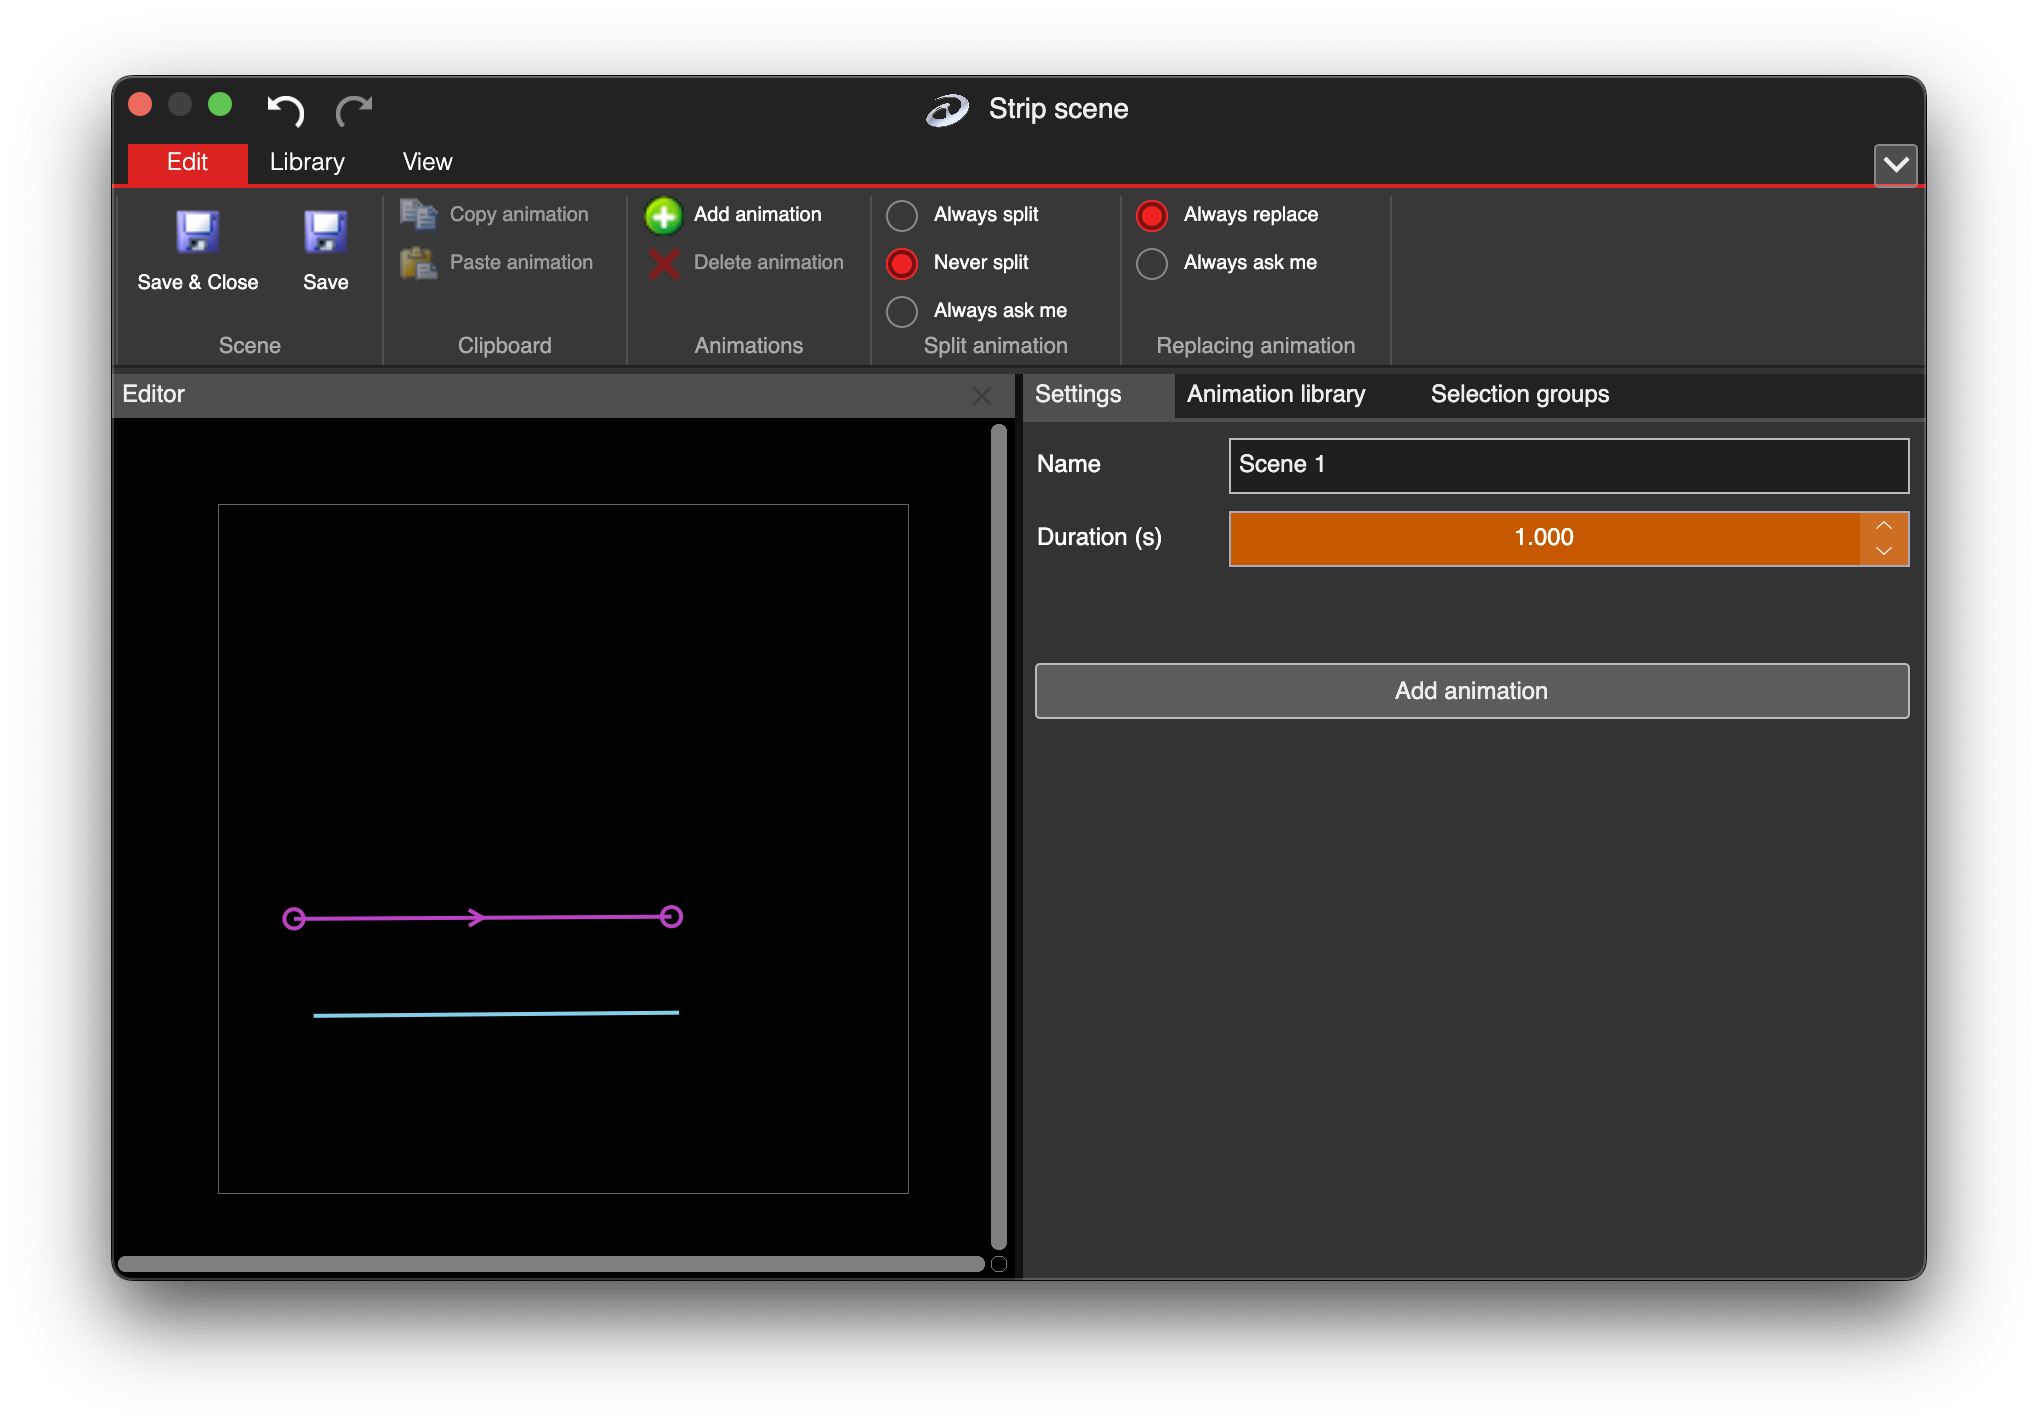
When a segment of the LED strip is selected, a new animation will become available to add.
In the Settings pane, you will be able to see the new animation settings. There are quite a lot of settings, but it is easy to use once you get used to it.
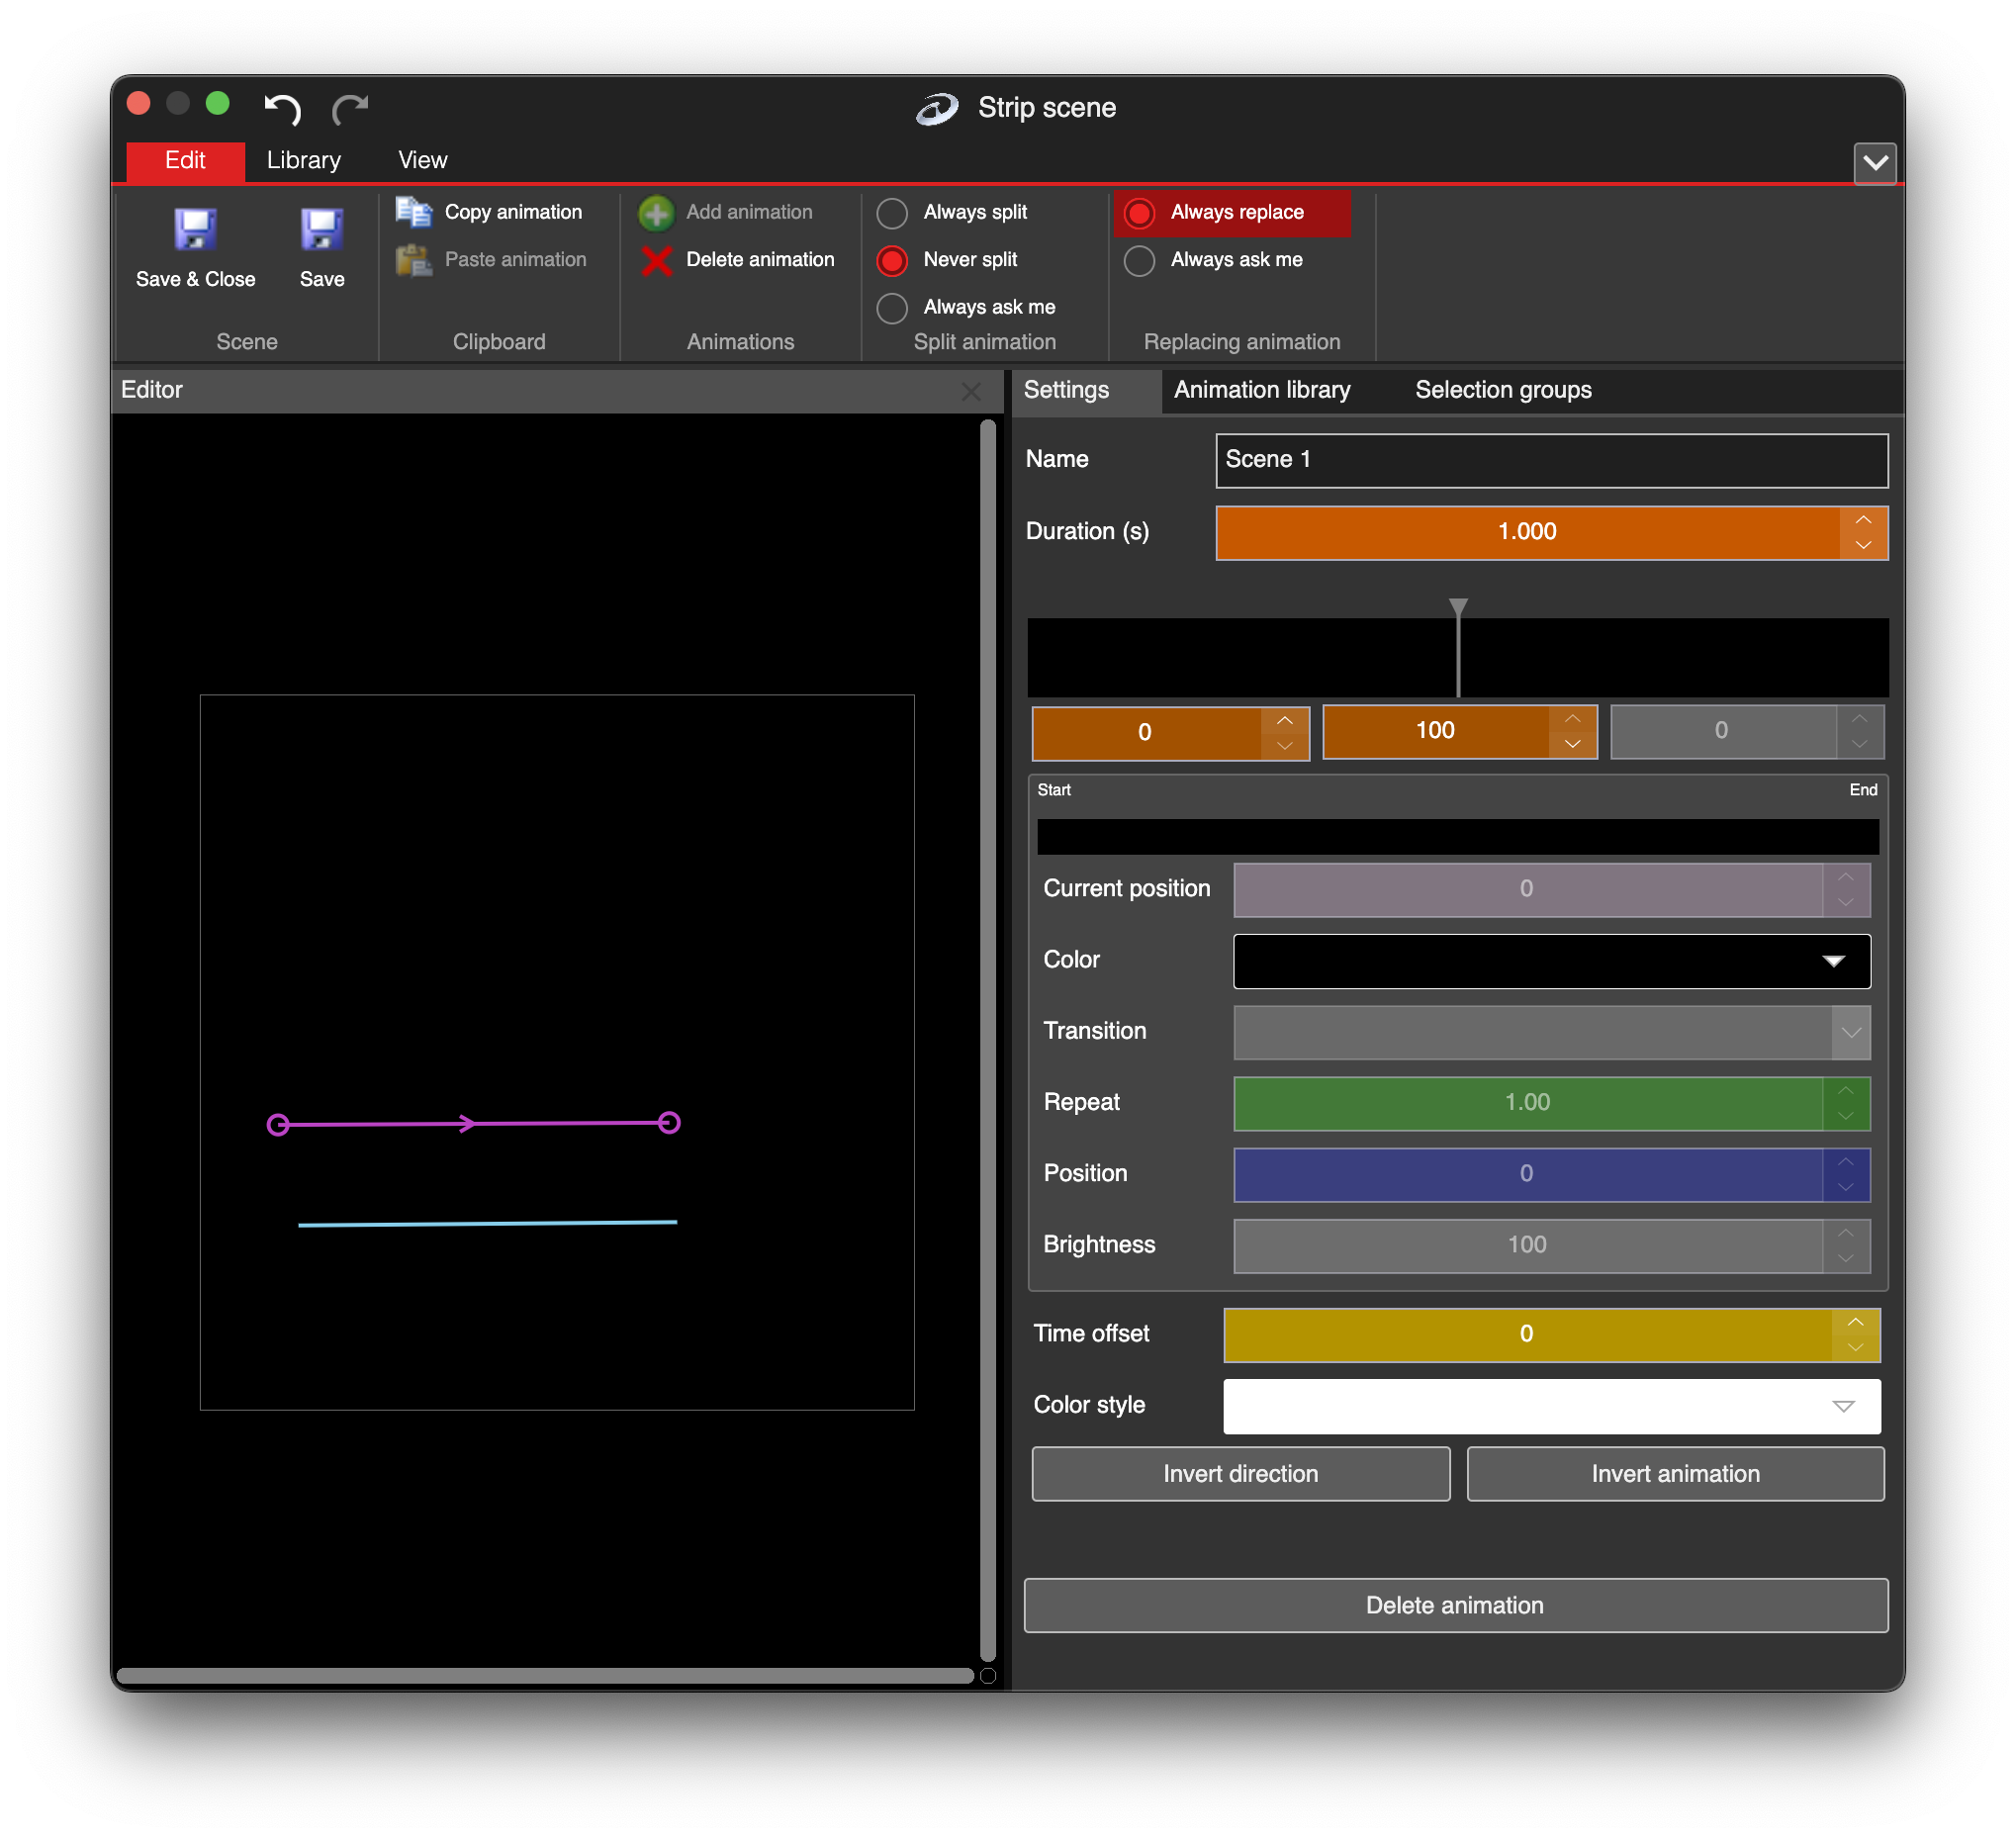
New empty strip animation.
Keyframes and Palettes
There are multiple important sections of the strip animation settings. Below is a brief description of the top area of the Settings pane.
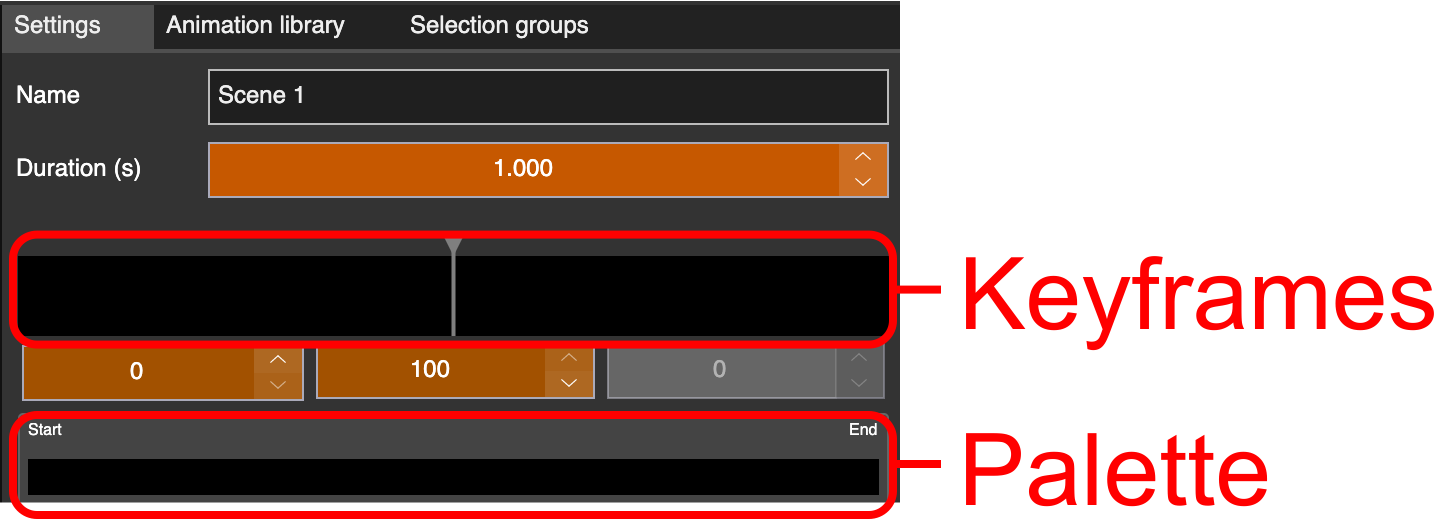
Two of the most important areas in animation are the keyframe and palette editors
Simple Color Palette Animations
The first area allows you to edit and create keyframes. Each keyframe represents a palette in time, which is then applied to the selected LED strip segment. To create a new keyframe, you must left-mouse double click on the keyframe section.
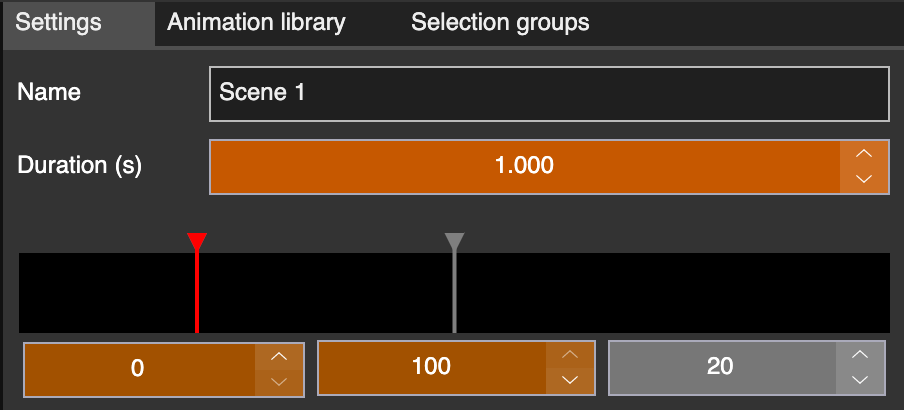
New keyframe added
Each keyframe can contain one or more color points, which define a color palette. To create new color points in the palette section, simply double-click with the left mouse button. Using the Color dropdown you can change the selected point color.

Color dropdown to change color of selected palette point
In the example image below, you can see a palette that starts with the color red and ends with blue. This palette is applied to the selected LED strip segment in the Editor pane. You can also see the red-to-blue color palette applied to the strip in the Preview window of the main window.
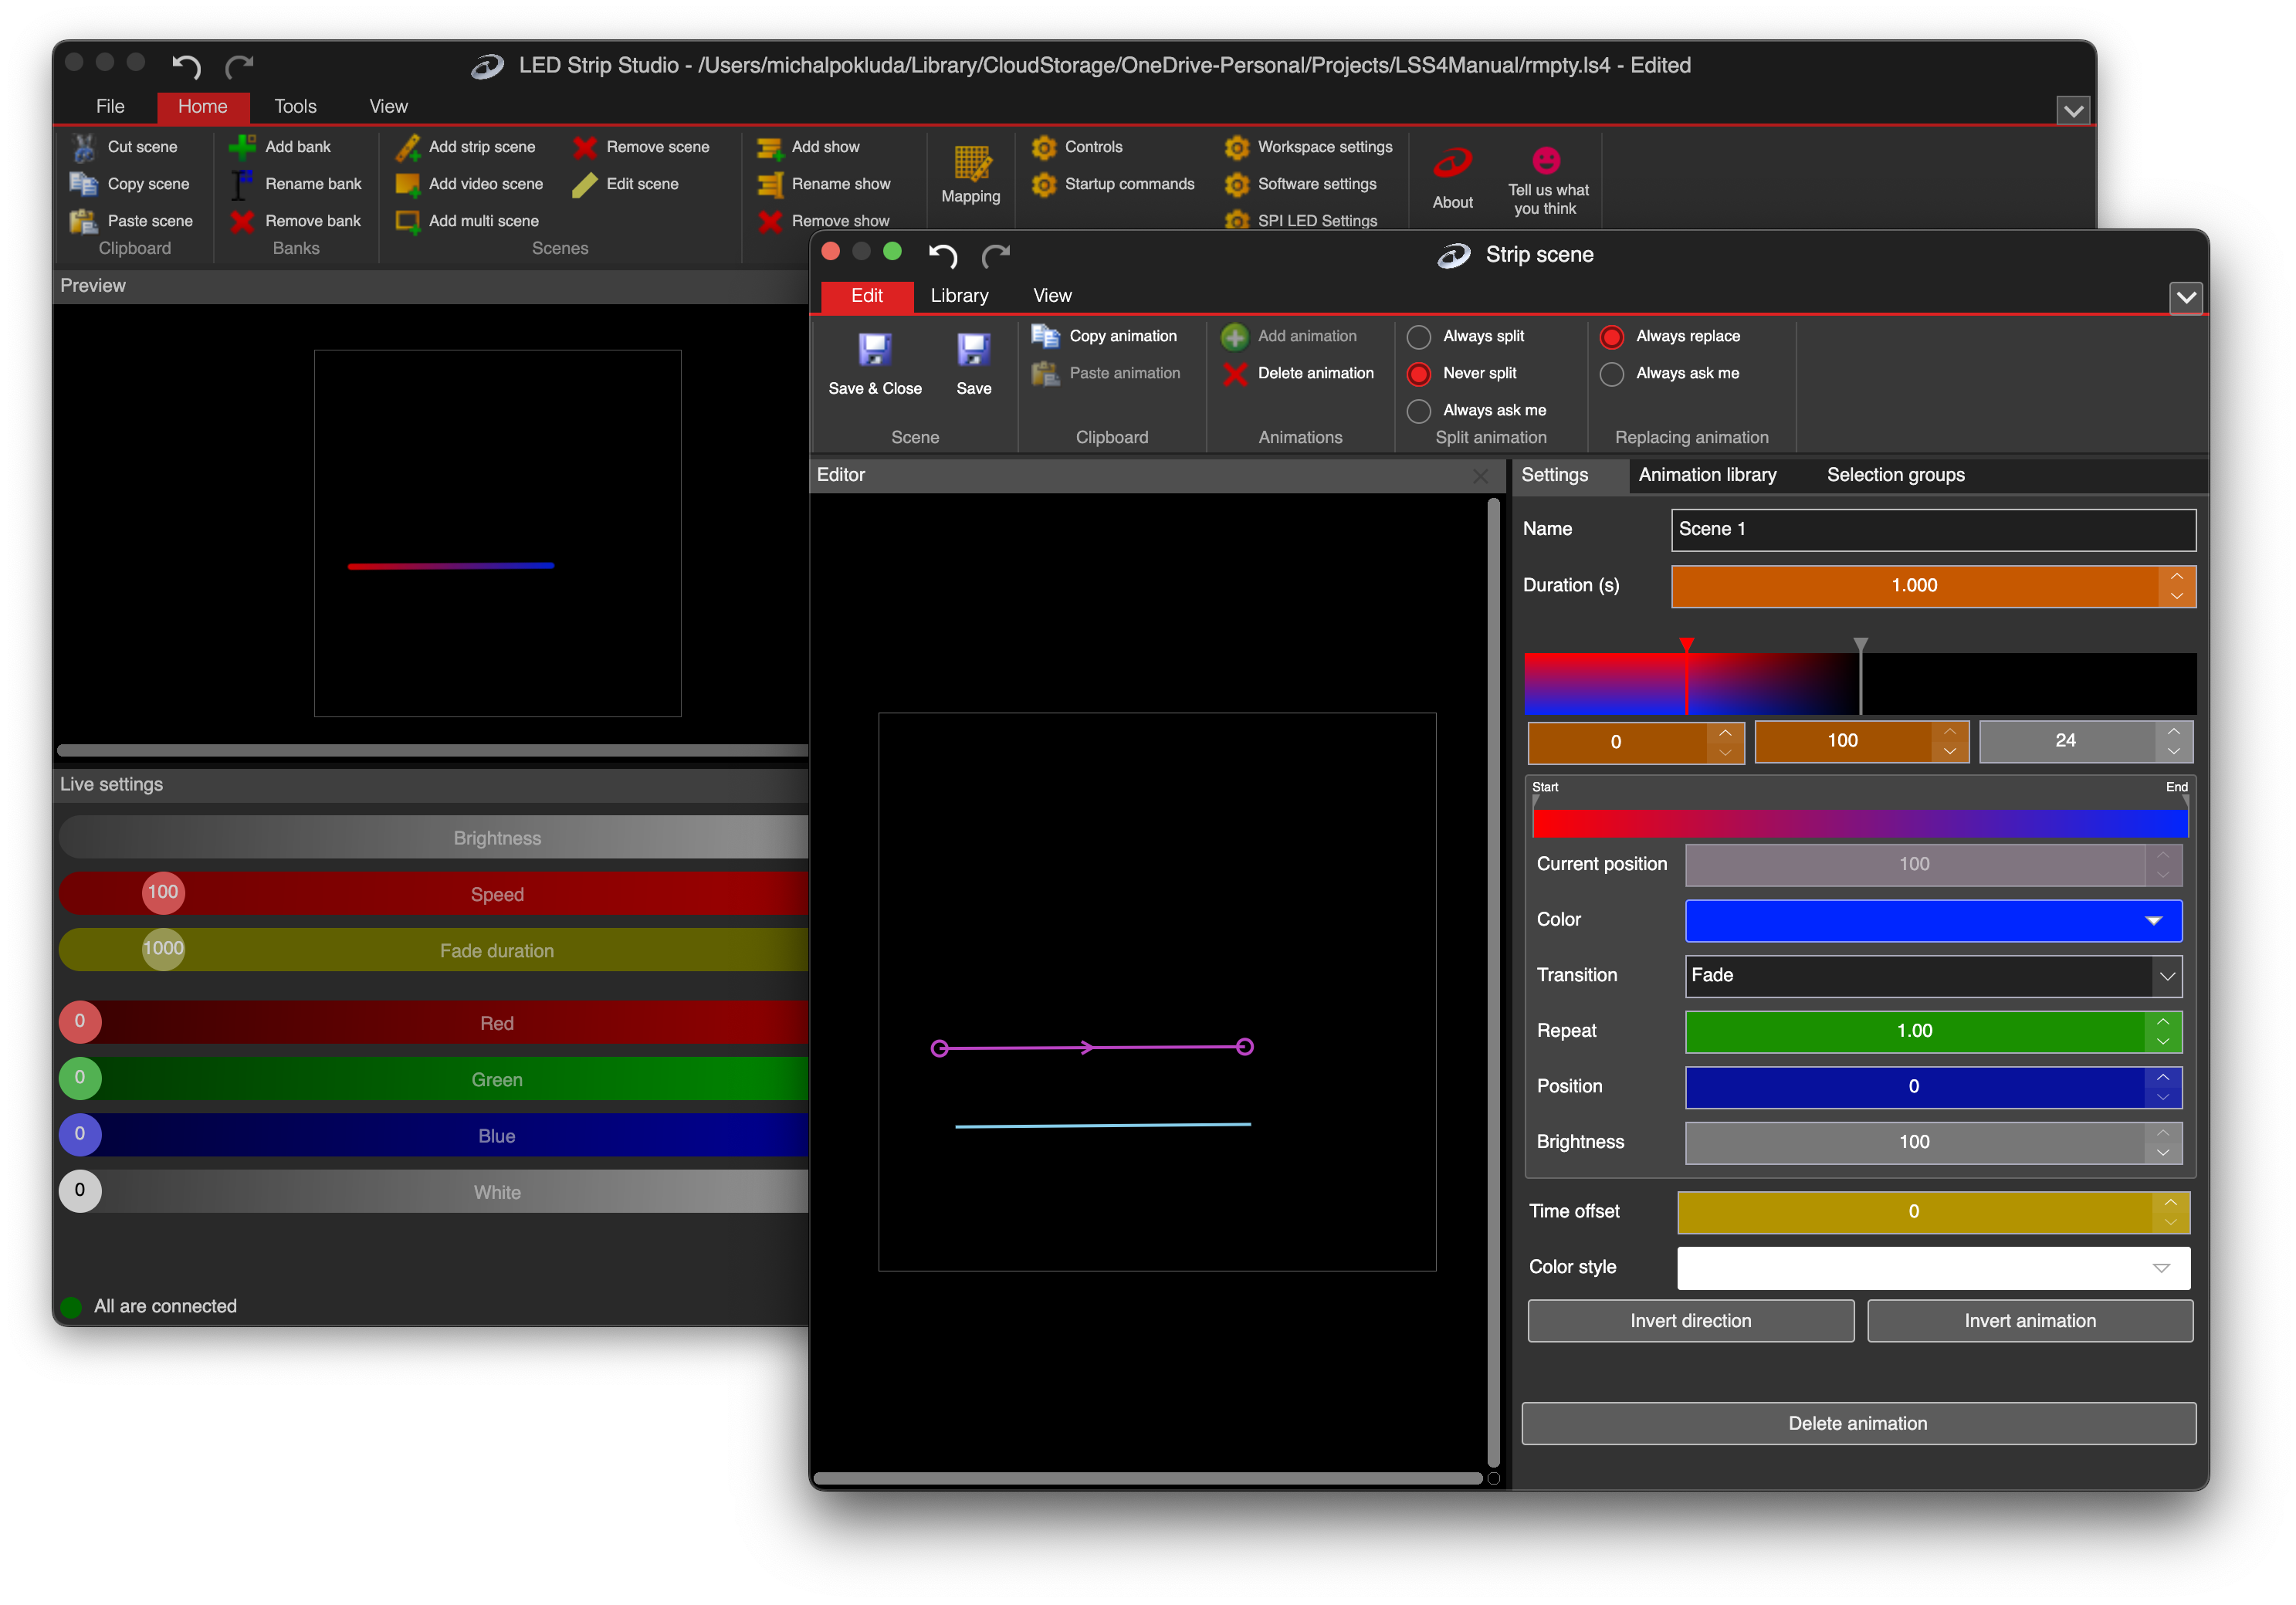
Red-to-blue color palette of the keyframe applied on LED strip
When a keyframe is selected in the keyframe area, the software will display only the colors of the selected keyframe. Once a keyframe is unselected, the animation will begin to run. In this case, the animation starts as red-to-blue and then turns off (goes to black) because the second keyframe is black.
We can, of course, change it. You can select the second keyframe and add different colors, such as yellow-to-green in my case.
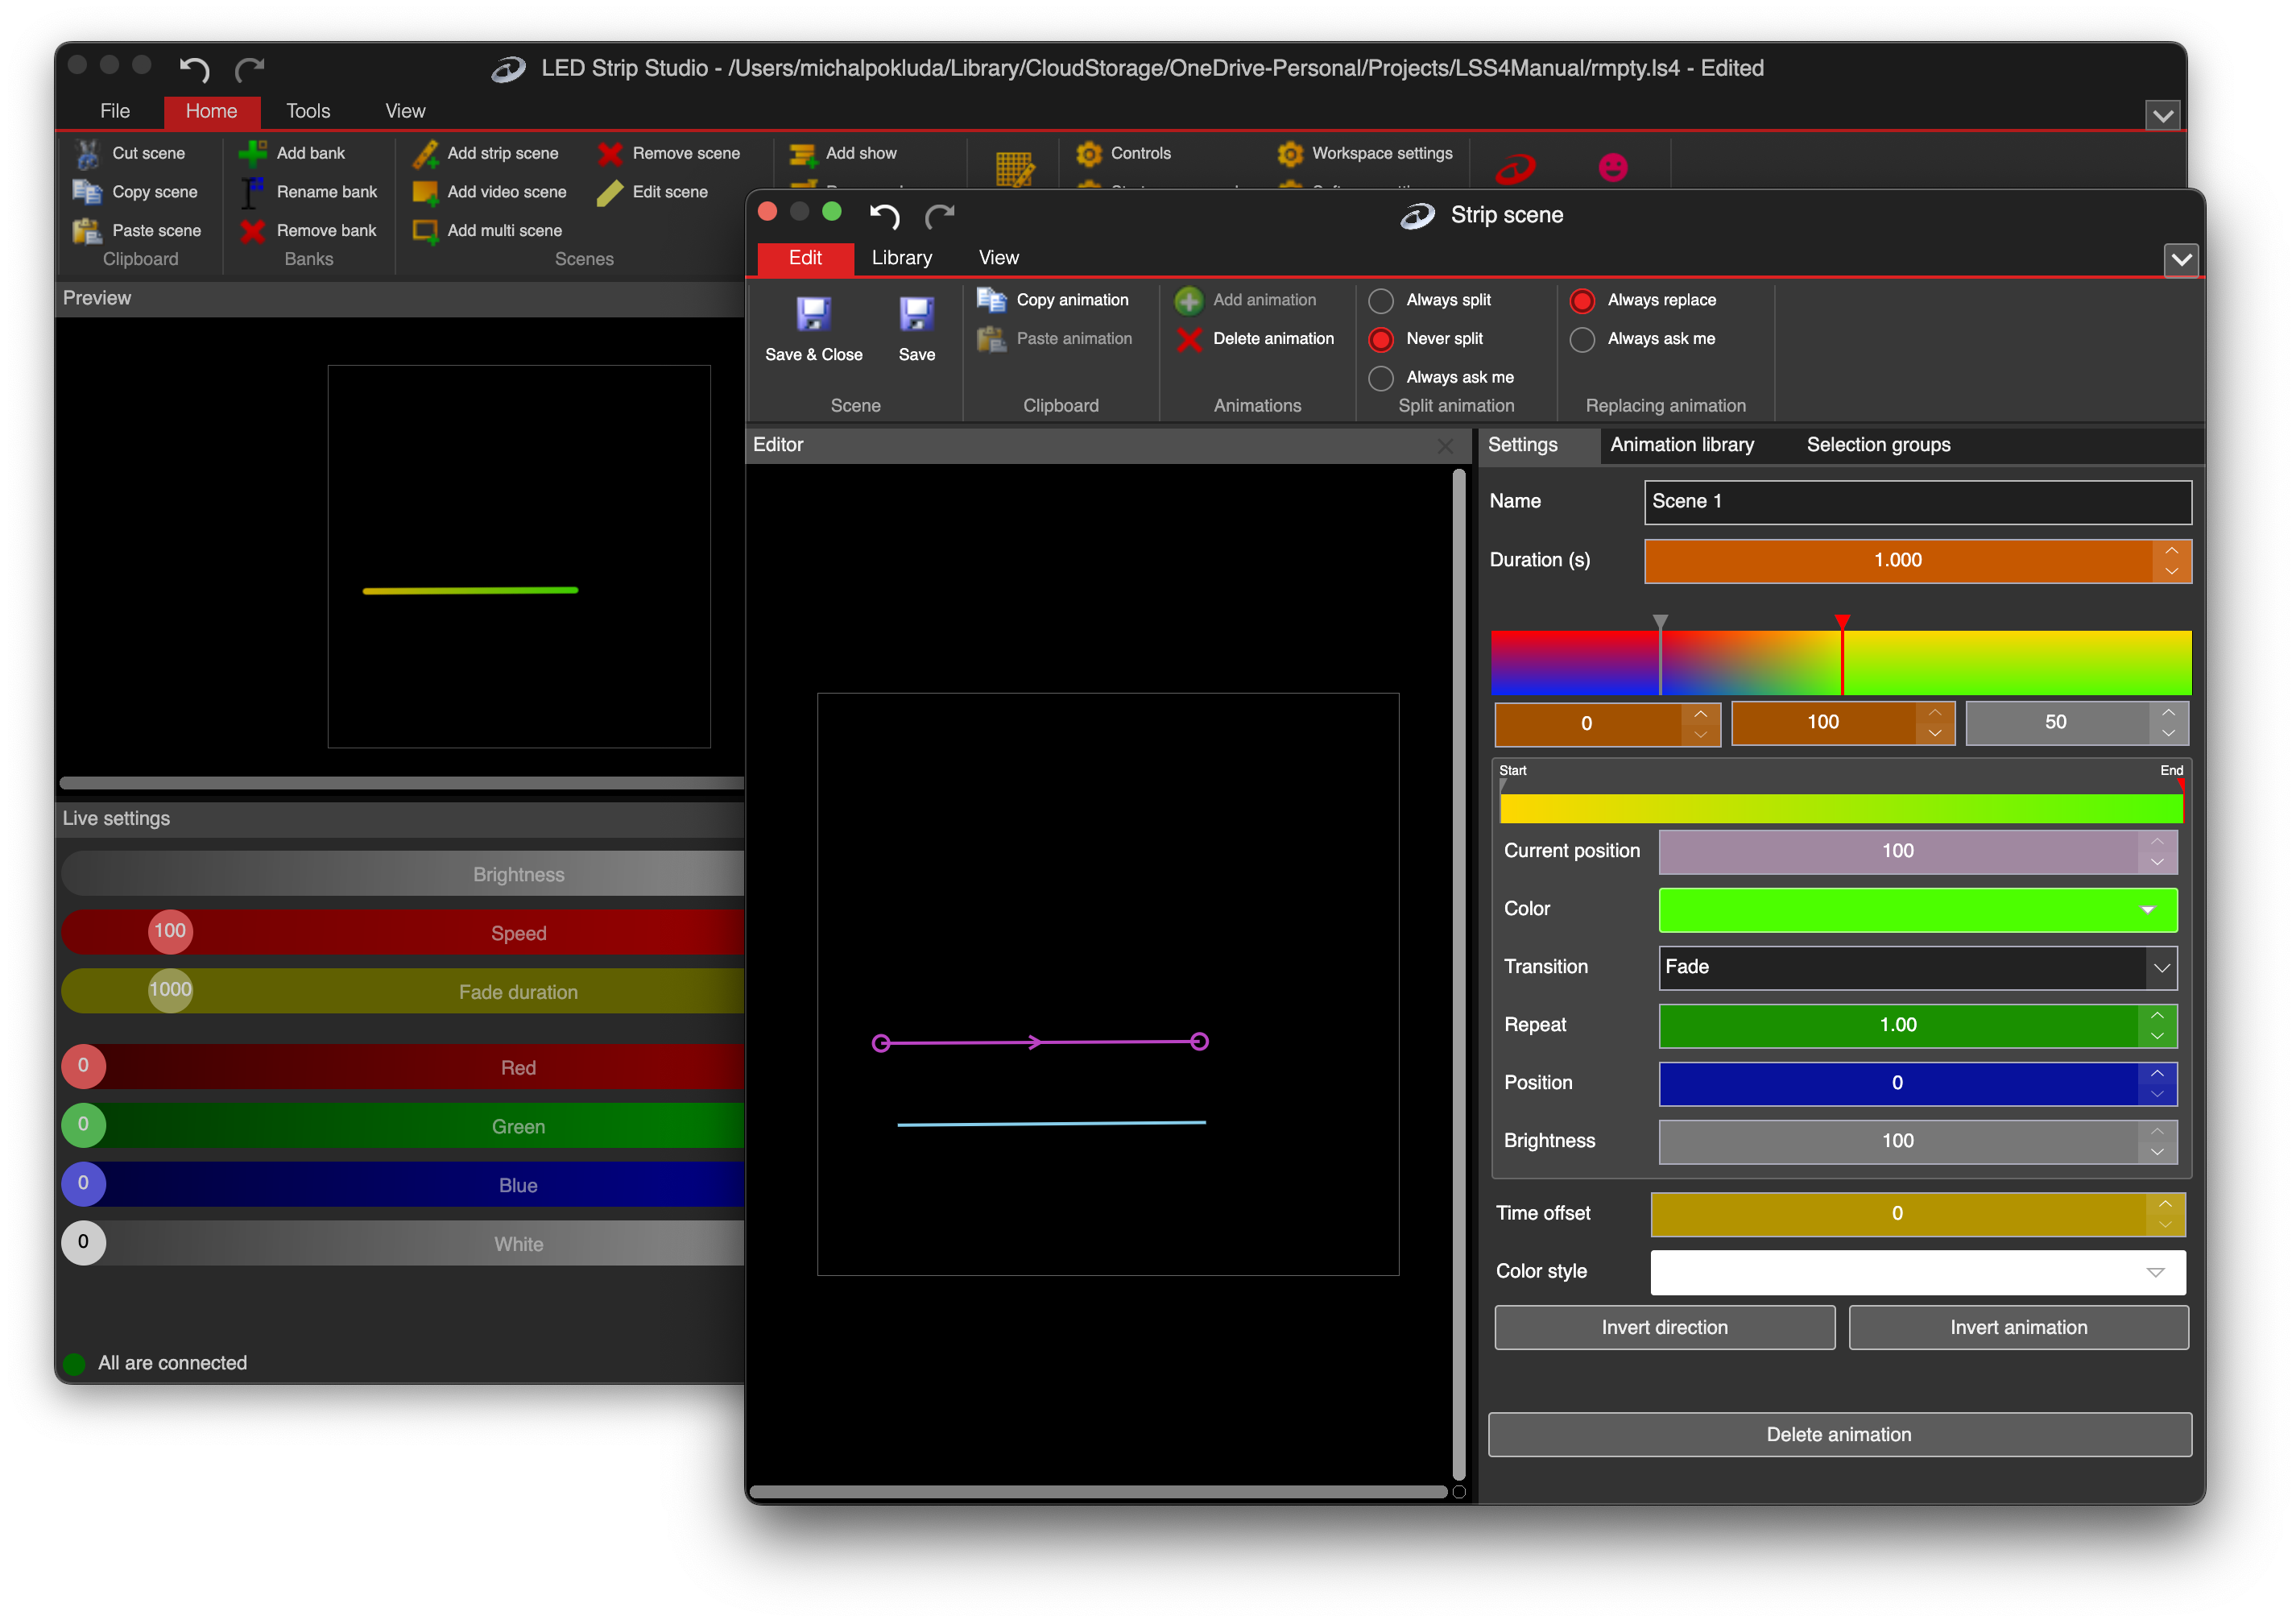
Yellow-to-green color palette of the keyframe applied on LED strip
You can change the position of every keyframe in the keyframe area and see how it affects the animation. If I move the red-to-blue keyframe to the leftmost position and the yellow-to-green keyframe to the rightmost position, the entire duration of the animation will slowly transition from red-to-blue to yellow-to-green color palette.
Color Palette Scrolling
The most important animation is the color scrolling of the palette across the entire strip segment. This is where the palette position comes into play. You can copy and paste our red-to-blue keyframe by using the right mouse button on the keyframes. There is a Cut/Copy/Paste command available for keyframes.
You can also paste the keyframe at the end of the keyframe area. By using the blue Position setting, you can scroll the palette from 0% to 100%. In the following image, you can see the same red-to-blue palette scrolling in the keyframe area.
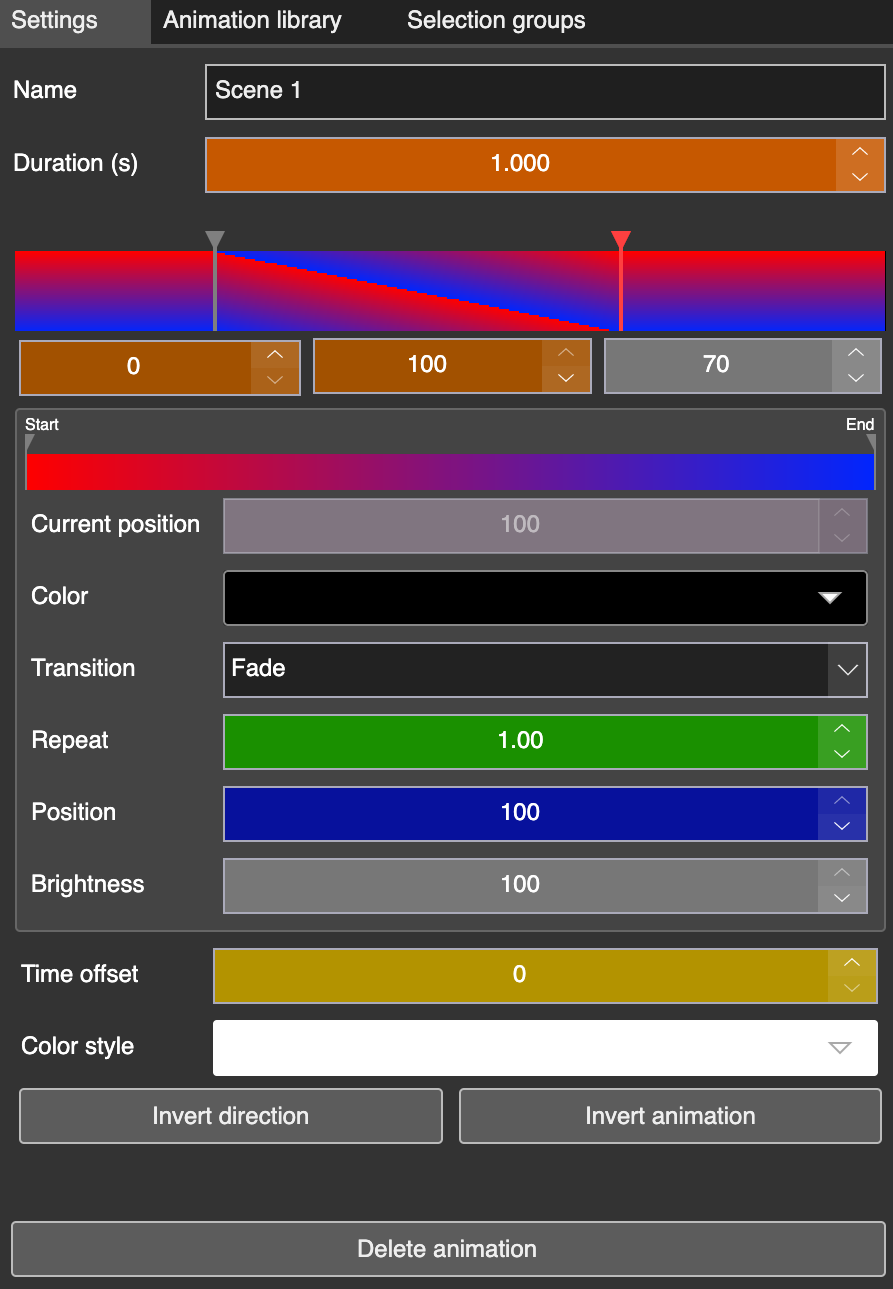
Palette position to create scrolling animation
There is also a faster way to do the same. Simply right-click on the keyframe you want to use for scrolling and select Default Animation from the menu.
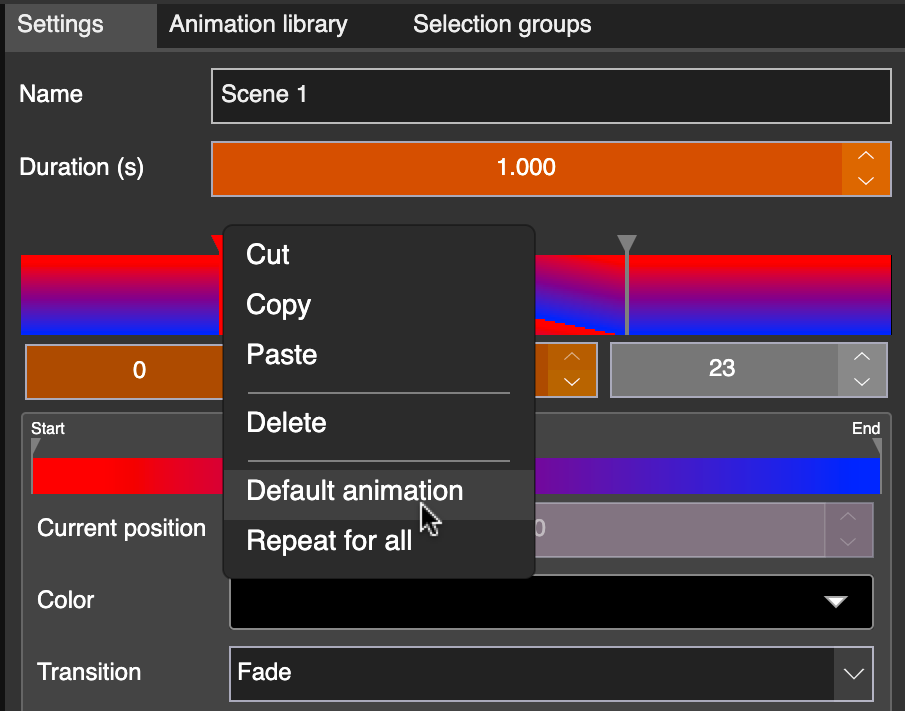
Default animation in the keyframe menu
Animation Editor Settings
Here is the list of remaining settings in the color animation editor.
| Setting | Explanation |
|---|---|
| Color | Changes the color of the selected point in the color palette. |
| Transition | Defines the type of transition between two keyframes: Fade, Morph, or Constant. |
| Repeat | Sets how many times the color palette is applied along the LED strip. |
| Position | Adjusts the scrolling position of the selected keyframe. |
| Brightness | Controls the brightness of the selected keyframe. |
Morph Transition
The Morph transition is ideal for creating animations where you want to light up the LED strip from the first LED point to the last one. It is recommended to use two points on the color palette.
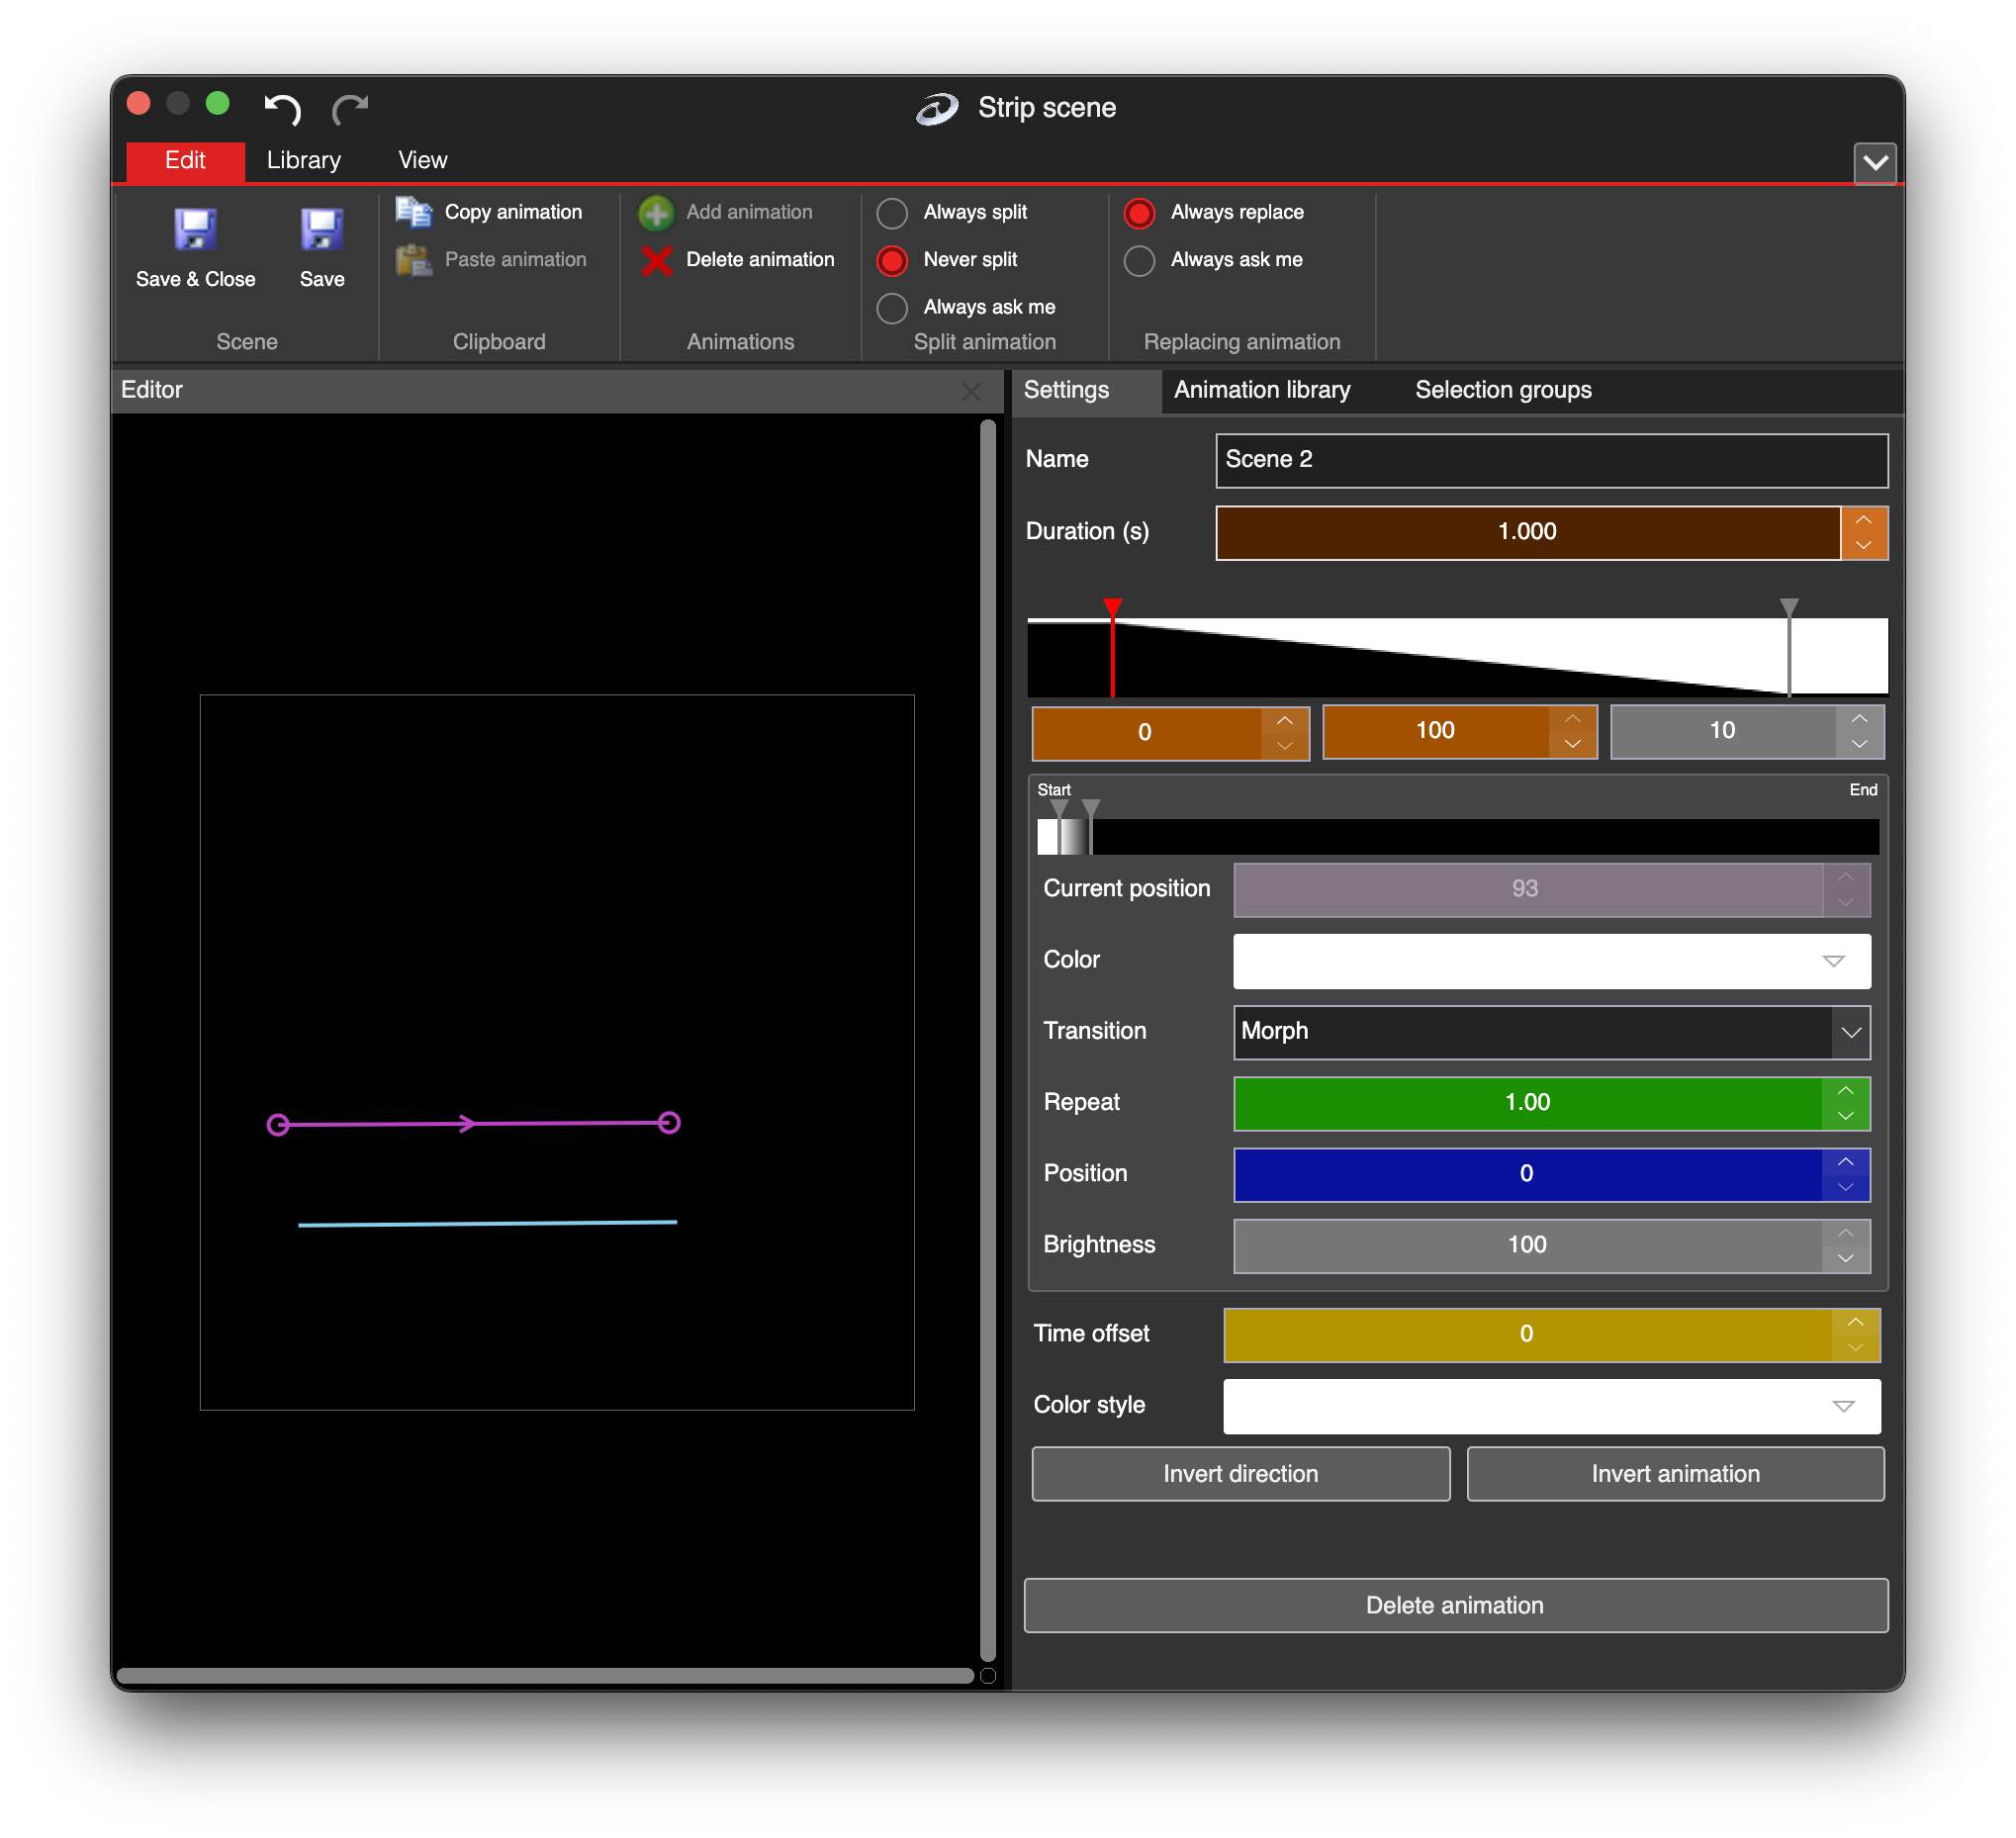
Keyframe 1 of morph transition
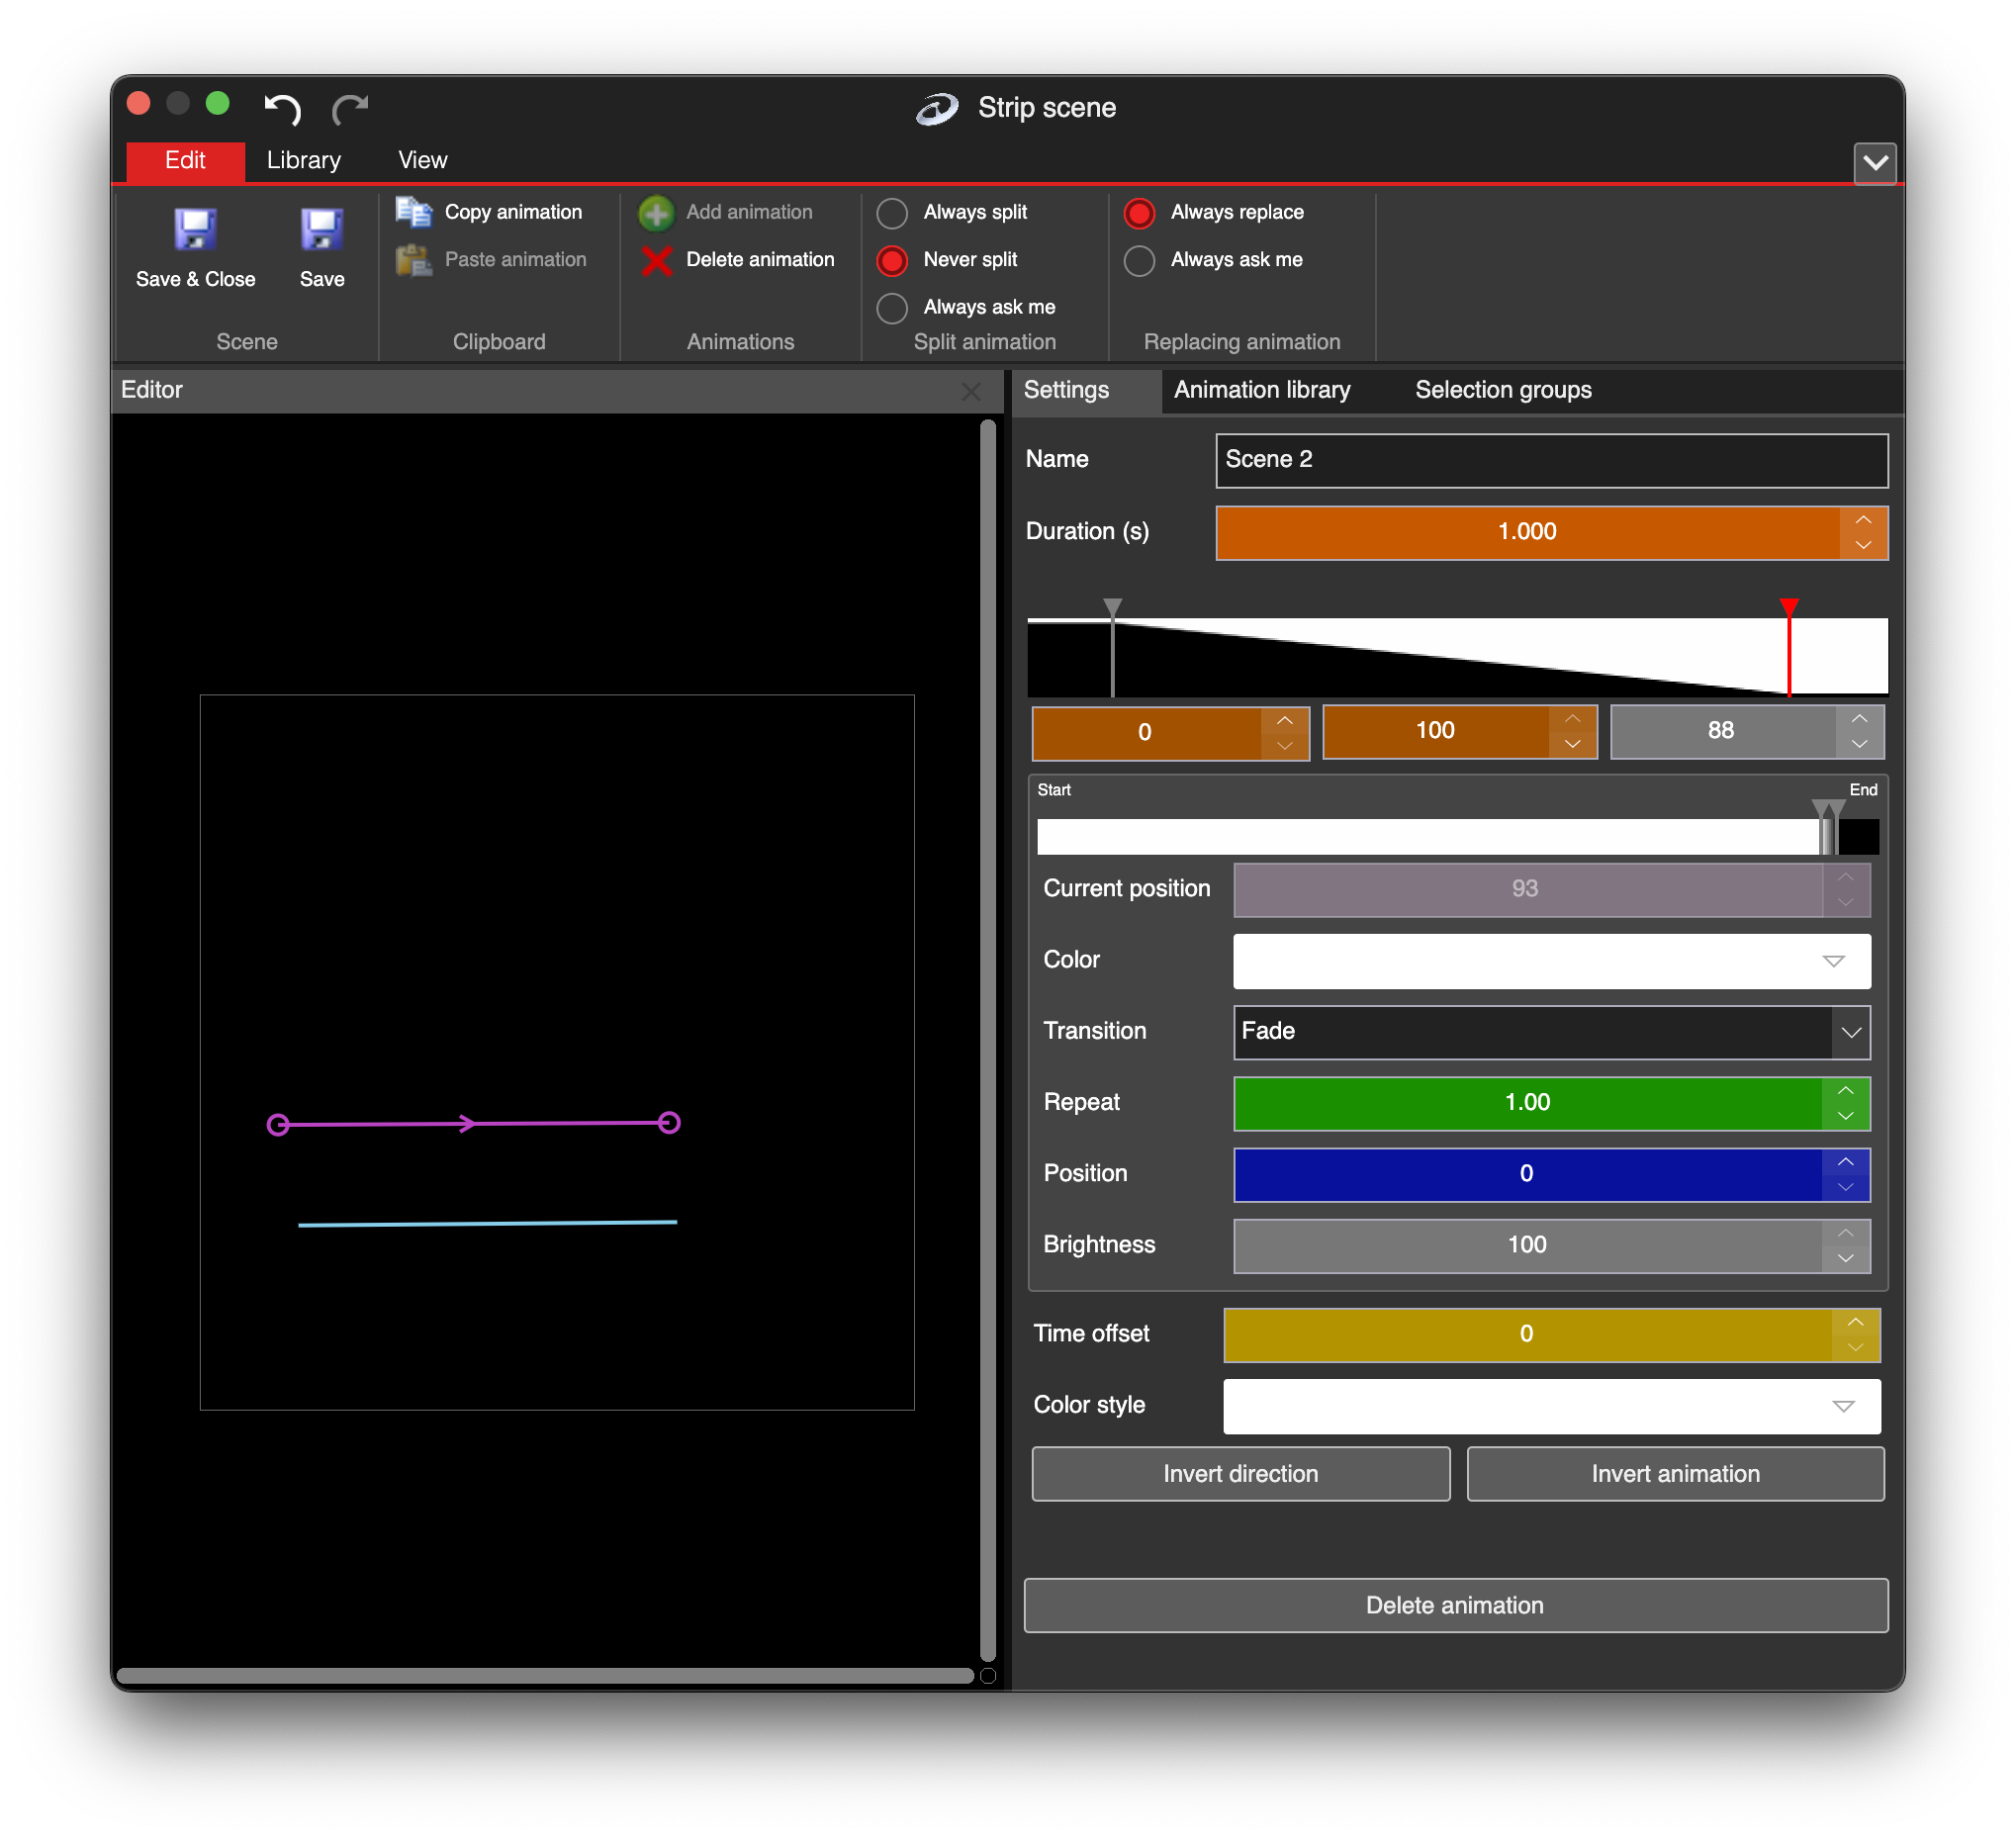
Keyframe 2 of morph transition
As you can see, both keyframes contain the same two color points. In keyframe 1, they are at the start, and in keyframe 2, they are at the end of the color palette. The software will try to calculate the smooth point position change from keyframe 1 to keyframe 2, producing an animation where the strip lights up from the first LED to the last.
Keyframe Dropdown Menu
There are additional commands in the keyframe menu to speed up the animation creation process.
| Command | Explanation |
|---|---|
| Cut, Copy, Paste | Standard cut, copy, and paste functions for keyframes. The pasted keyframe appears at the position where you right-click with the mouse. |
| Delete | Deletes the selected keyframe. |
| Default | Creates a default scrolling animation using the selected keyframe. |
| Repeat for all | Quickly sets the Repeat value for all keyframes. |
Additional Settings Commands
There are additional settings in the animation editor.
| Setting | Explanation |
|---|---|
| Duration | Sets the animation duration in seconds. |
| Time Offset | Defines the start offset delay as a percentage. For example, at 50%, the animation starts halfway through the timeline. |
| Color Style | Changes the color of all points in all keyframes, while preserving their intensity. Useful for quickly creating, for example, a pure-red animation. |
| Invert Direction, Invert Animation | Reverses either the animation direction or the color palette order for the entire animation. |
Time Offset Example
The image below shows two LED strip segments using the same animation. The only difference is the Time Offset - the second strip is 50% ahead in time.
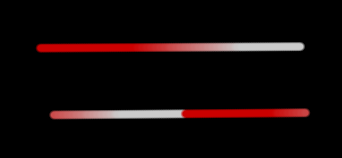
Using Time Offset in animations