Configuration file
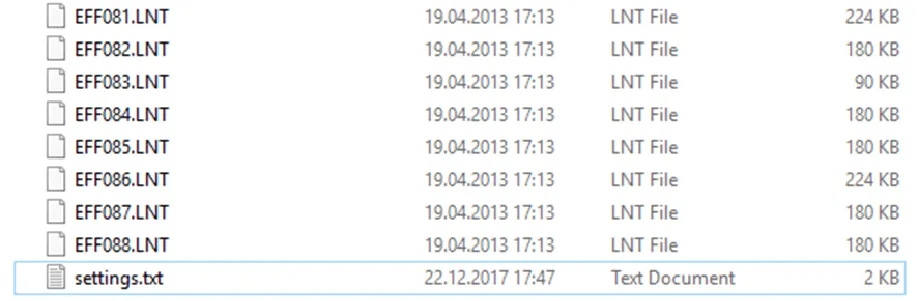
The board configuration is stored in one simple text file on the SD Card. The file is named settings.txt and must be stored in the root directory of the SD Card. Animation files are stored in LNT file format. Both file formats can be generated in LED Strip Studio software.
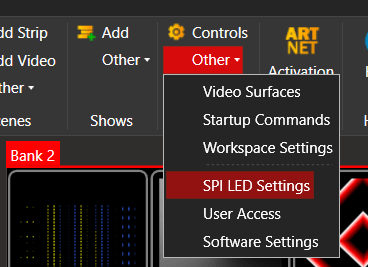
How to do configuration file
To create settings file, you can use LED Strip Studio software.
Here is an example of a configuration step by step:
-
Go to menu Settings→Other→SPI LED Settings
-
Following dialog appears
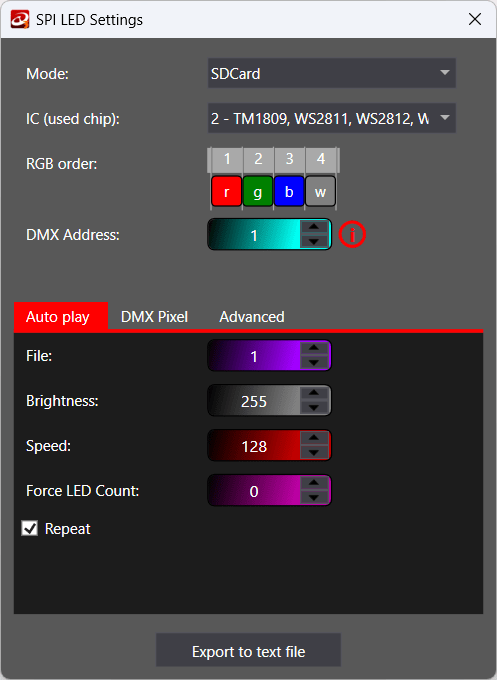
Mode
SD Card mode – In this case, SPI LED Controller uses LNT files from the SD Card to be played. 7 DMX channels are used.
Pixel mode – This mode converts incoming DMX signal into RGB pixel format. You can later define how many pixels should be used (in DMX Pixel tab). Each pixel uses 3 DMX channels for red, green and blue color. You can also change the order of the RGB color channels.
IC (used chip)
Allows you to select used LED strip type control chip (IC).
RGB order
Allows you to define RGB order for the LED strip. Some LED strips might use for example blue, green, red order instead of standard red, green blue. This setting allows you to change this color order.
DMX Address
Starting DMX address for both, SD Card and Pixel mode.
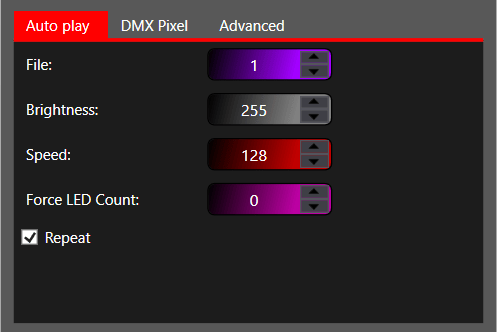
File
This is the initial file, which will be played after the SPI LED Controller is turned on. In case it’s 0, SPI LED won’t start any file after start (you can start it only manually using the buttons).
Brightness
You can lower the brightness of the animation. All animations are affected (in case you switch between them using the buttons).
Speed
Speed of default animation. 128 is default animation (as played in LED Strip Studio software). 255 is 4x faster than default animation. If the value is lower than 128, the animation is slower (64 = 1/2 of speed).
Force LED Count
By default, SPI LED plays animations on the number of LEDs defined in LNT file. But sometimes you can use more or fewer LEDs on your LED strip or LED pixel and you don’t want to export the LNT files once again. This setting will convert all the animations to the desired number of LEDs. In case it’s 0, the number of LEDs is defined by LNT file.
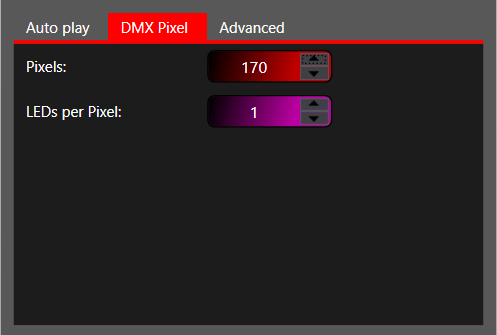
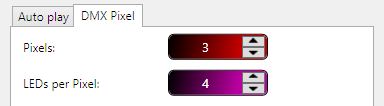
Pixels
Defines how many pixels are used on SPI output. Value range is from 1 to 170. By 1, SPI LED Controller uses three DMX channels (from DMX Address) and sends it to SPI output as 1 RGB pixel. In case you use 170, SPI converts 170*3 = 510 DMX channels (almost all the DMX universe).
LEDs per Pixel
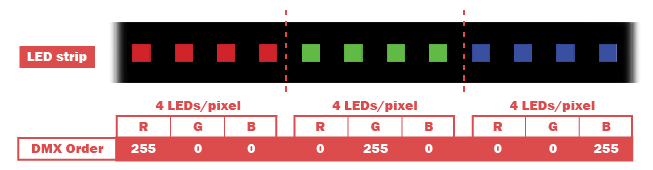
Three DMX channels are converted to one LED pixel by default. But this setting allows you to create a group of LED pixels controlled by DMX channels. E.g. in case LEDs per Pixel is 4, four LED pixels behave as one on SPI output (they’ll have the same color set by these 3 channels). This is quite practical in case your LED strip or LED pixel line uses more than 170 LEDs and you still want to control them over DMX.
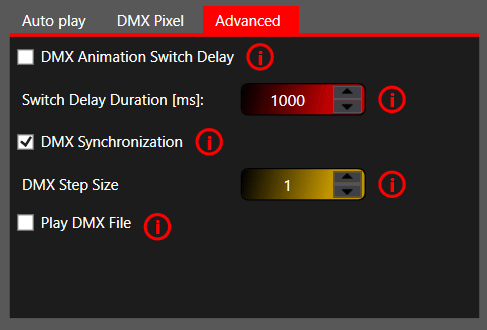
DMX Animation Switch Delay
Enable delay when triggering animations with DMX controller, e.g. one with slides. This delay will prevent unwanted triggering of animations. You can set the delay duration in Switch Delay Duration.
DMX Synchronization
Enable/disable DMX synchronization for the device. Warning – if it’s enabled, you can’t use simple DMX to trigger the scenes from SD card.
DMX Step Size
You can use several DMX animation channel values to select one animation. E.g., when set 5, the DMX value 0-4 is used to play animation 0 (which is animation off), 5-9 is used to play animation 1 and so on.
Play DMX File
This will force to use LDM files instead of LN2 to play just DMX content. The pixel LED output is not used when checked! It’s practical in case you need to control DMX fixtures using SPI LED device.
Export to text file
Export settings.txt to the selected directory. This file must be saved on the SD Card for SPI LED Controller.
Standalone (autoplay) mode
It’s perfect for standalone applications, where you don’t want to use computers. Typical usage is an advertisement
If there is NO DMX signal connected to SPI LED Controller, the device starts automatically playing file defined in the settings.txt file.
The SPI LED Controller device locates all LNT files (animations) saved on the SD Card and allows you to switch between them using up/down buttons.
DMX controlled mode
You can use SPI LED Controller in two different modes when controlling over DMX:
- SD Card
- Pixel mode
DMX mode will start run automatically after DMX signal is detected.
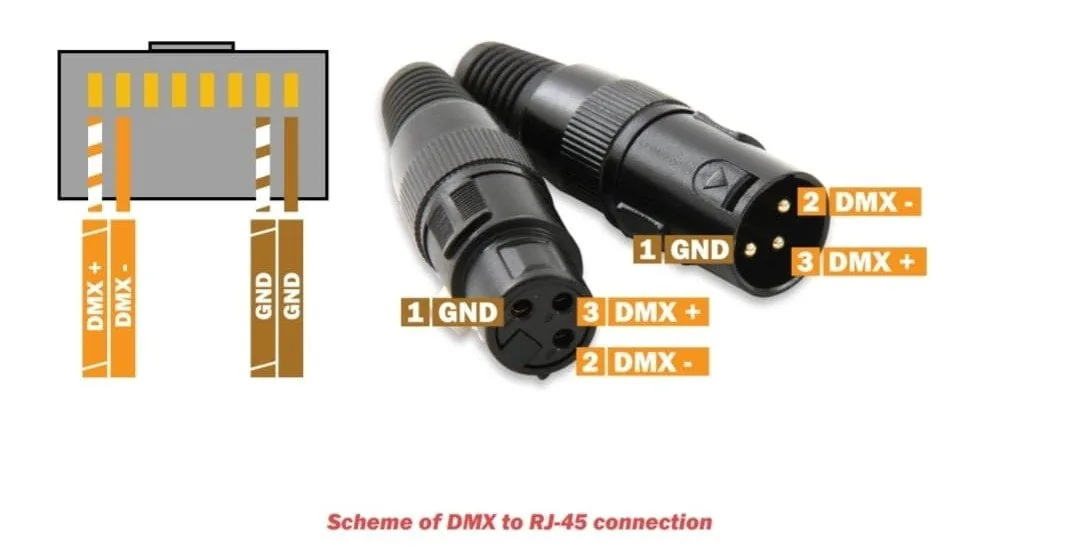
You can find the DMX to RJ45 connection scheme on the image below.
SD Card
It’s SD player mode when you are able to choose any file from the SD-Card and play it on your digital LED strips. You can use DMX channel to select animation stored on SD Card and let it play on LED strips/LED pixels. You can see an example of right DMX values in this mode:
| DMX Order | Property | Example |
|---|---|---|
| 1 | Brightness | 255 |
| 2 | Animation | 1 |
| 3 | Animation speed (default is 128) | 128 |
| 4 | Red | 0 |
| 5 | Green | 0 |
| 6 | Blue | 0 |
| 7 | White | 0 |
A short video which helps you with a single installation and explains SD-Card mode.
Pixel mode
In this mode, you control every LED pixel of your LED strip directly using three DMX channels. You can use more LED pixels than one, thus more DMX channels will be used. The calculation is easy, you use N pixels, you’ll need 3N DMX channels*. Also, don’t forget, you can use LEDs per Pixel setting to create groups of pixels with the same color.
In pixel mode, every 3 DMX channels are used to control red, green and blue color of one (or more) LED pixels. You can define how many pixels are used (thus how many DMX channels). The only limitation is, SPI LED Controller can control up to 1024 LEDs. If you want to use more, you’ll have to use several SPI LED Controller devices.
A short video which helps you with a single installation and explains Pixel mode.
Images
Videos


