


Description
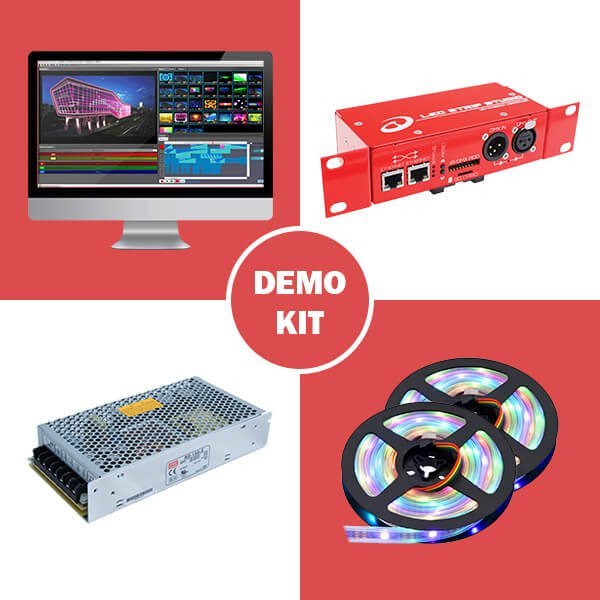
The LED demo kit is the shortest route from “maybe we will do a pixel LED project” to watching one run on your own desk. LED Demo KIT 3 packs a full LED Ethernet Controller 3, a LED Strip Studio 3 licence, ten metres of addressable strip and a matched power supply into one box. Everything arrives pre-wired, and the software workspace arrives pre-mapped. So you connect three cables, press a button, and the strips play.
Beginners usually lose their first week to the wrong questions. Which controller? Which power supply? Which connector goes on which end of the strip? This kit answers all of them in advance. Therefore your first evening goes into effects and mapping, not into a parts list.
What is inside the LED Demo KIT 3 box?
The kit is a complete working system, not a sample. In other words, every part a small pixel LED installation needs is already in the box, and every part is already matched to the others.
LED Ethernet Controller 3
LEC 3 is the red box at the centre of the kit. It drives up to 4096 addressable RGB pixels, or 3072 RGBW pixels, across four powered SPI outputs. That is 24 full Art-Net universes from one unit. In addition, the controller carries a lifetime licence of LED Strip Studio 3, which is exactly what separates it from the SPI MATRIX.
LED Strip Studio 3 licence and workspace
The software licence comes with the controller. More importantly, the kit ships with a prepared workspace: scenes, effects and a mapping that already match the two strips in the box. So your first show is one click away. You then learn LED Strip Studio by taking a working project apart, instead of staring at an empty canvas.
Two 5 m reels of PRO 60/m pixel strip
Ten metres of addressable strip at 60 pixels per metre, with SPI connectors already fitted. That is enough to map a real shape — a doorway, a desk edge, a section of truss — rather than one straight test line. Consequently the mapping exercise resembles an actual job.
What else the LED demo kit includes
The kit includes a power supply matched to the supplied strip, the prepared cables and wires, an SD card with an adapter, and an Ethernet cable for the link to your computer. Nothing has to be crimped, cut or sourced separately.
Who is this LED demo kit made for?
Three groups buy it. First, lighting professionals moving from conventional fixtures to pixel LED, who want to learn the system before they quote a job. Second, integrators and resellers who need a working demo to put in front of a client. Third, technical teams comparing LED Strip Studio with Madrix, MadMapper or Resolume, because the kit takes Art-Net from all of them.
It also works as a training tool. A kit on the bench means new staff practise mapping, IC settings and power planning on ten metres of strip. They do not practise on a live installation.
From unboxing to the first effects
The kit is plug and play, and the whole path is documented in the demo kit guide together with a video tutorial.
Hardware setup, step by step
Plug the strips into the SPI outputs. Then connect the power supply to mains, 110–240 V in and low voltage out to the controller. Next, slide the SD card into the slot on the front panel. Finally, press the front buttons to switch between the pre-loaded effects. The strips start playing straight away.
Software setup, step by step
Install LED Strip Studio on a Windows PC. Then set that computer’s IP address into the 192.168.1.x range. The controller answers on 192.168.1.147 by default, so give the computer a different address, for example 192.168.1.22. Connect the Ethernet cable and launch the software. A green marker in the bottom left corner confirms the link. The PC configuration guide walks through those network settings screen by screen.
Life after the demo, and how far the kit scales
Nothing here is demo-grade hardware. LEC 3 is the same controller that runs permanent installations, so the kit becomes the first node of a real system rather than something you outgrow in a month.
It also runs without a computer. Animations exported to the SD card play stand-alone, triggered by the front buttons, the DIP switch or the web interface. Meanwhile the same unit accepts Art-Net from third-party software, from Art-Net hardware and from lighting consoles. It also accepts DMX512, either for direct pixel control or for triggering stored animations.
Everything is configured in a browser, including a quick status bar that reports the controller state at a glance. Pixel capacity is a licence rather than a different board. The controller comes in 1024, 2048 and 4096 RGB pixel versions, and a lower version upgrades to 4096 later without new hardware.
LED Demo KIT 3 — questions and answers
Do I need a Windows PC for the software?
Yes. LED Strip Studio runs on Windows, and there is no macOS version. However, the controller itself needs no computer once the animations are on the SD card.
Can I use the kit with Madrix, MadMapper or a lighting console?
Yes. LEC 3 receives Art-Net pixel data from third-party software, from Art-Net hardware and from lighting consoles. In addition, it takes DMX512 for pixel control or for triggering animations stored on the SD card.
How many pixels can I add later?
Up to 4096 RGB or 3072 RGBW pixels on one controller. The unit ships in 1024, 2048 or 4096 RGB versions, so a smaller version upgrades to the full 4096 without new hardware.
What is the difference between this kit and buying the parts separately?
The parts are matched and pre-wired, and the software workspace already maps the two strips. Therefore you skip the compatibility questions that usually cost a beginner a week.
The strips do not light up. What now?
Go through the hardware steps once more, in order: strips into the SPI outputs, power to the controller, SD card in the slot. If the strips stay dark, contact support with a photo of the wiring.
Not sure which pixel version suits your project? Talk to our support team and we will size the controller, the strip and the power supply with you.